Add a Webform
A. Form Title and Configuration
“Add Webform” creates the Webform instance in UnionHall. It’s where you edit Administrative information of the form such as, if it’s open or closed, or if you want to schedule when it closes. You can also schedule the Publish date of the form.Figu

Just before the Open/Closed status setting (Figure 1.), there is a drop-down for “Webform”. This required field selects a starter form for “Join a Union” or “Custom” form. For any form that isn’t “Join a Union”, select “Custom”. Click Save.
B. Form Elements
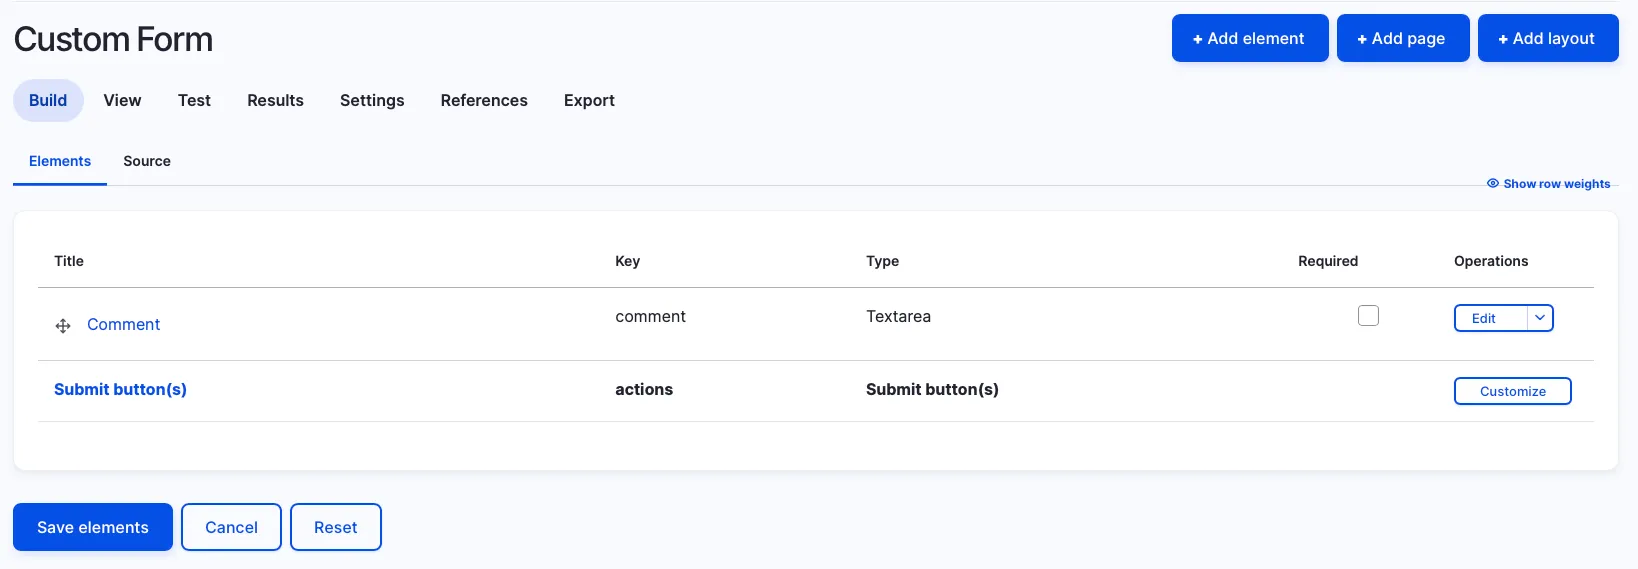
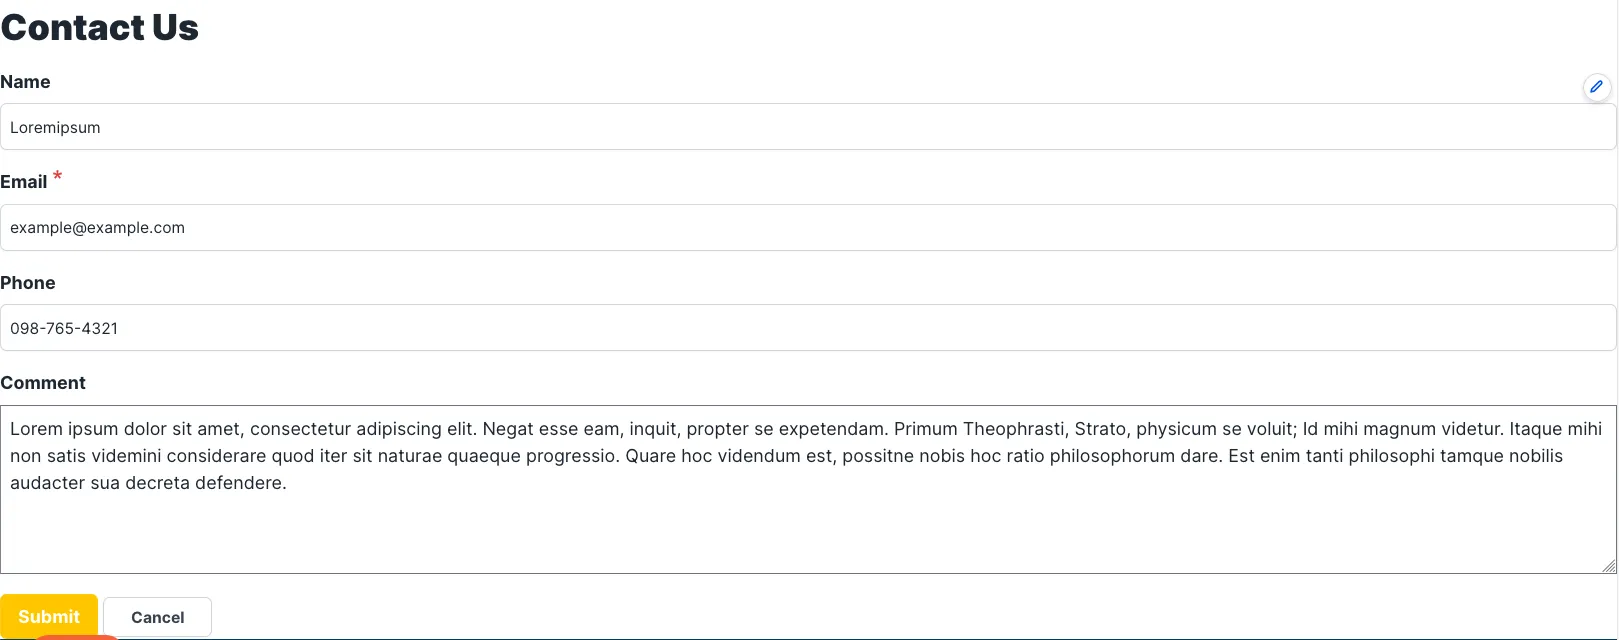
We can start off by creating a standard “Contact Us” form. In Figure 2, you can see we already have our comment field and Submit button.
Click the “+ Add Element” button.
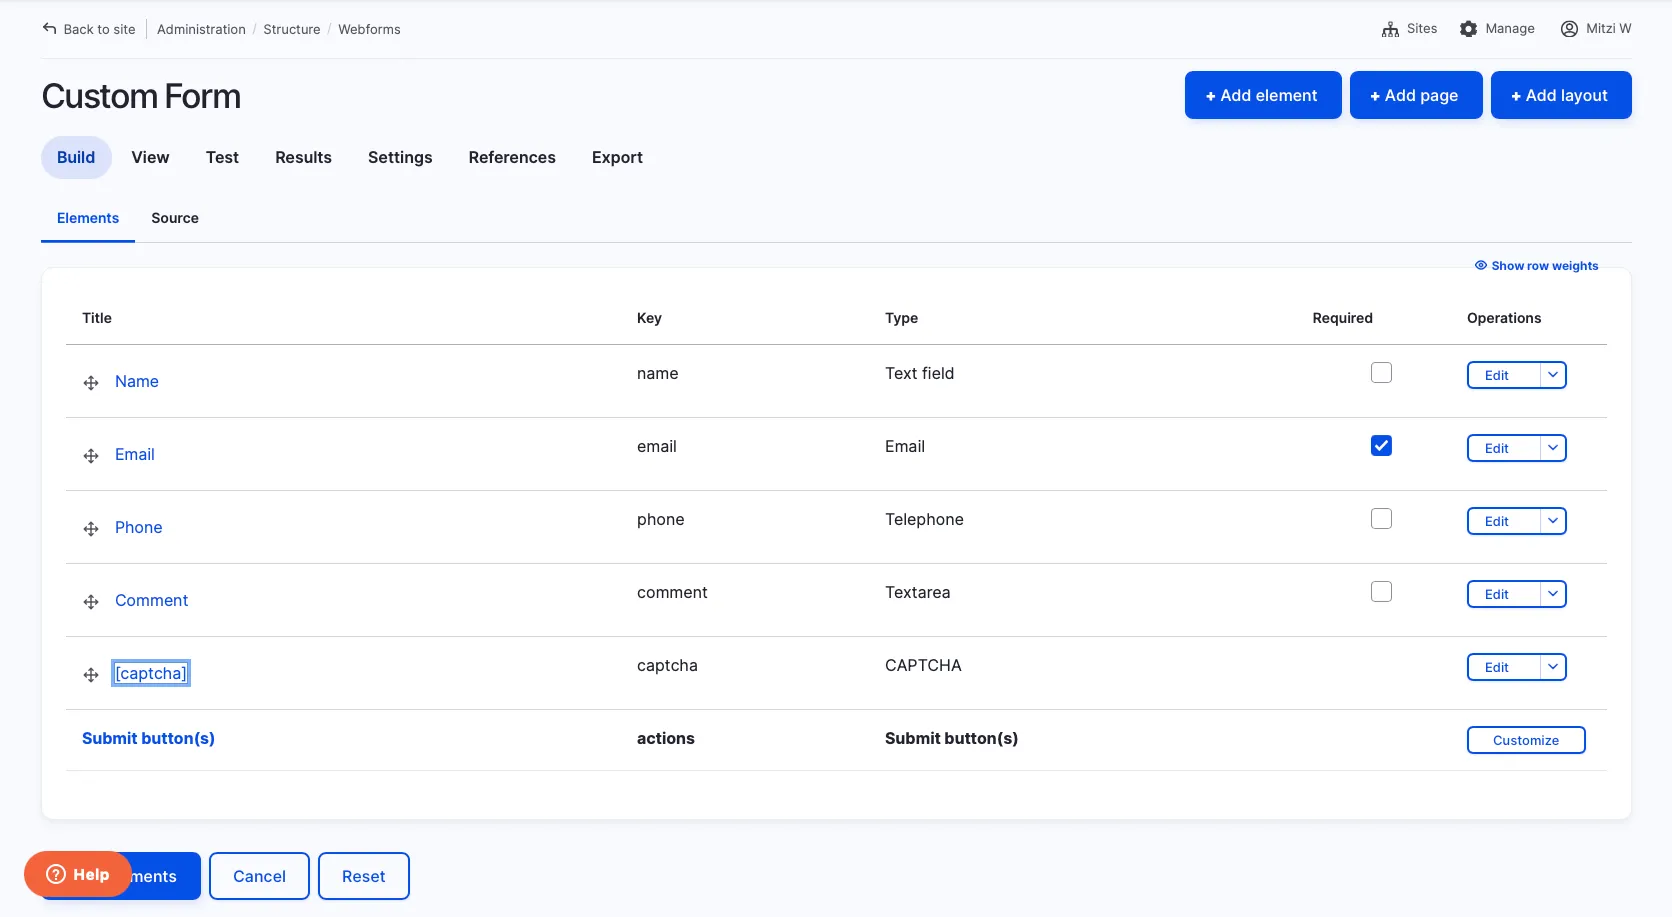
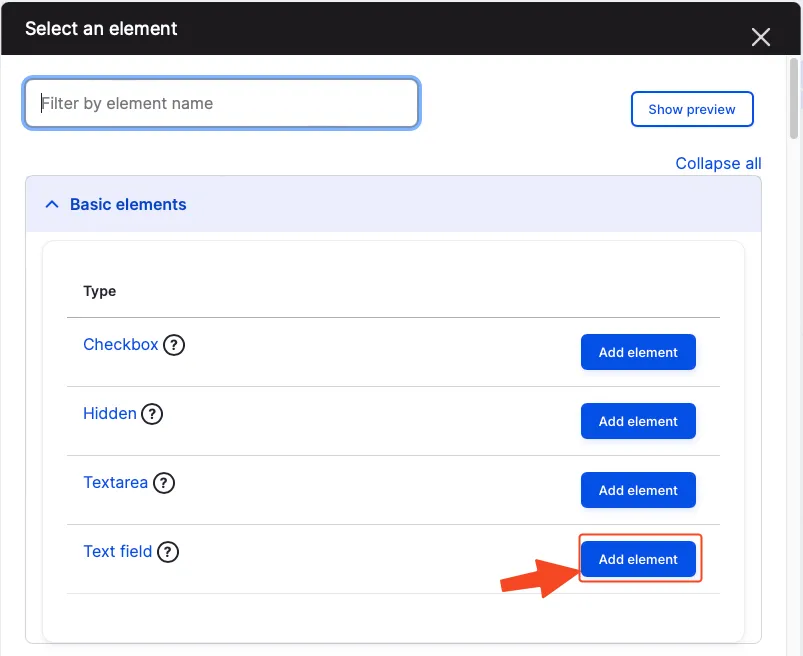 | 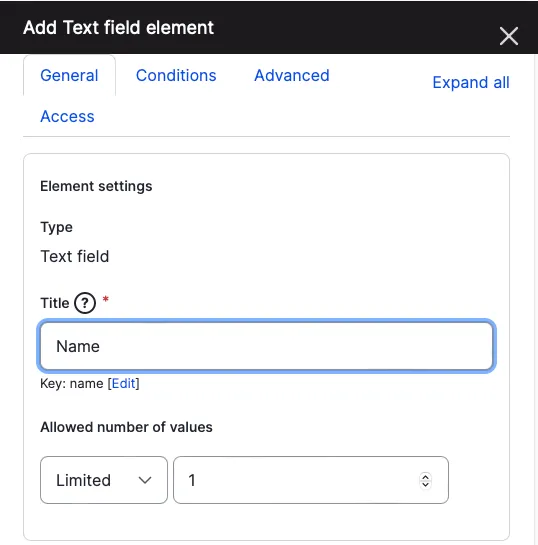 |
| Figure 3a. Element listing window | Figure 3b. Element settings for “Name” field |
We’ll add the basic fields for a contact form, Name, Email, Phone. The Submit button and comment/message field was created with the initial Webform creation. In addition to the basic contact fields, it is ‘Best Practice’ to add “CAPTCHA” to the form. “CAPTCHA” is like a built-in ‘Are you Human?’ test.
The "Test" tab renders the form you've created complete with test input ready to submit.
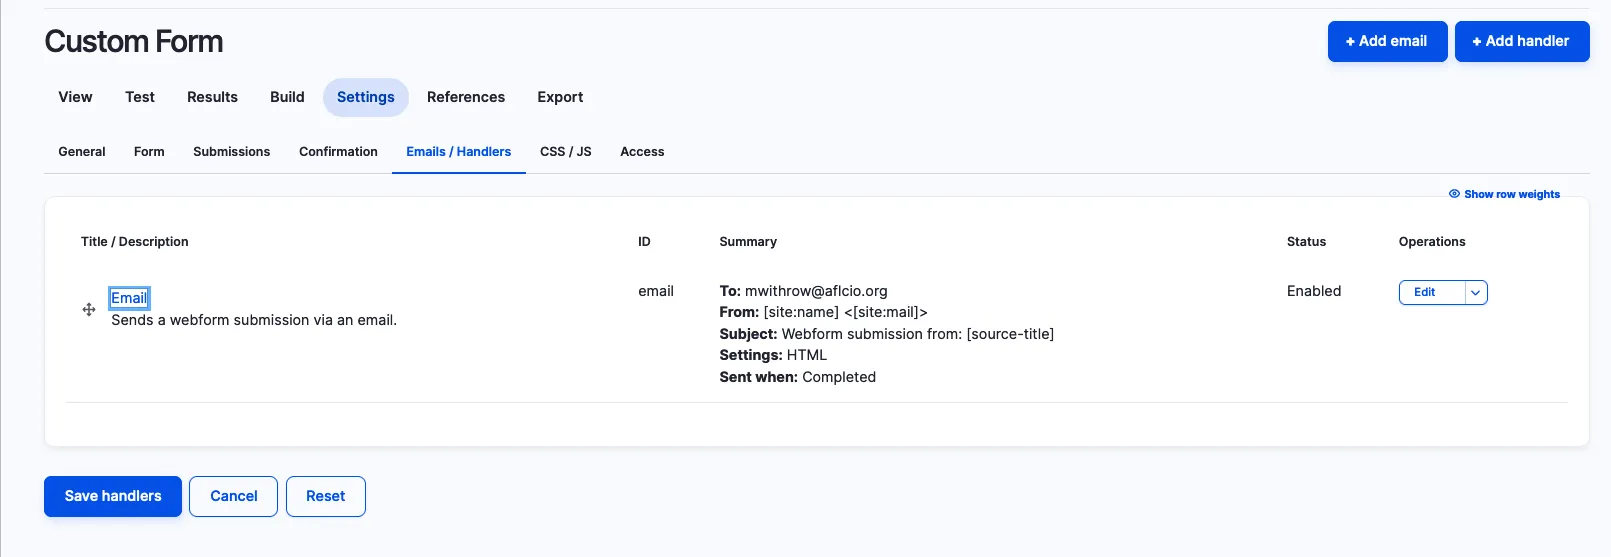
Return to the "Build" view, and select the "Settings" tab. We want to set up the Contact form with an email address to receive the form submissions. We want to add an "Email Handler".
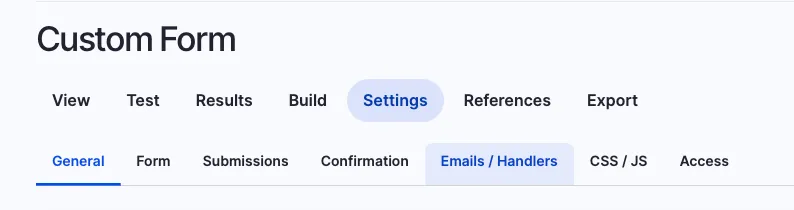

Select "+Add Email". The "+Add Handler" is a more advanced topic that will be covered as a secondary part of this guide.
 | 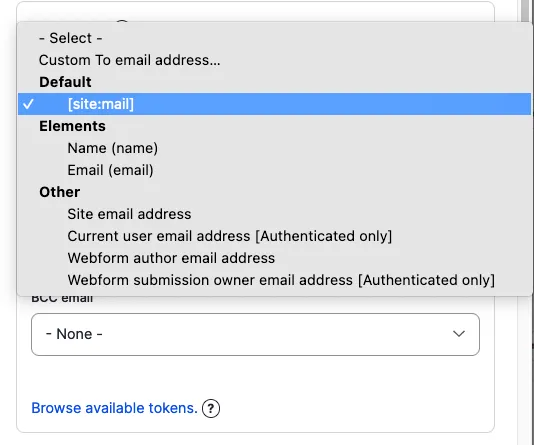 |
| Figure 8a. Email configuration window. | Figure 8b. Email configuration selection. |
The "default" setting sends the submission to the site email in the field under Manage > Configuration > Site Configuration > Site Email. We will select the option above that, "Custom To email address".
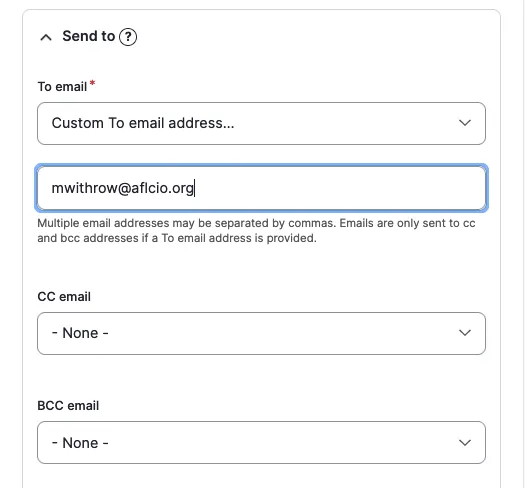
So, I've entered my own email address into the field (Figure 9.) and we can do the same with "CC email" and the "BCC email".